Friday, October 26, 2012

S'mores Cupcakes......yummy yummy!

One way the hubs and I like to show appreciation is through food.  What better way to say Thank You than a beautiful batch of yummy cupcakes?  I can't think of much more than cupcakes, that is also easy on the ole pocketbook!  A couple of weeks ago the hubs asked me to bake something for the nurses he was working with on a residency rotation.  I LOVE when he asks me to do this because: 
#1 I love to give to others
#2 I love to bake a BIG batch of sweets....eat one two...and pack up the rest so they stop screaming at me to eat them all!  Please tell me they scream at you too...

For this specific appreciation gift I decided to try something new.  What sounds better than S'mores Cupcakes?  Shew wee!  I am a sucker for campfire S'mores.  I combed over many recipes on the internet...I mean Pinterest....and decided to incorporate about 3-4 recipes into one.  

These cupcakes were sooooo good.  I can't even explain how hard it was not to eat more than one two.  The hubs isn't a huge cake fan and he even said "nice work in the kitchen".  Haha, love him.  

A moist chocolate cake is filled with marshmallow cream and topped with a graham cracker buttercream - can you say "holy moly"...I sure did.  

Try these out ASAP.  This recipe is worth the time in the kitchen.  Who knows...maybe you can keep half for your family and gift the other half to brighten someone's day!  

Every time I bake, Murphy thinks I might be making dog treats again...he is just making sure I guess.

 S'mores Cupcakes

Ingredients
Chocolate Cupcakes:
1 ¾ cup sugar
¼ cup brown sugar
1/2 cup vegetable oil
1 cup sour cream
2 teaspoons vanilla extract
2 eggs
2 cups flour
1 cup cocoa
1 1/2 teaspoons baking powder
1 1/2 teaspoons baking soda
1 teaspoon salt
¾ cup boiling water
One sleeve of graham crackers, processed into fine crumbs (use for cake & buttercream using directions below)

Marshmallow Cream Filling:
4 oz cream cheese
3/4 cup marshmallow cream
1 ½-2 cups powdered sugar

Graham Cracker Buttercream:
8 oz cream cheese, softened
½ cup butter, softened
4 cups powdered sugar
¾ cup graham cracker crumbs (fine crumbs)
1 teaspoon vanilla
2-3 tablespoons whipping cream

Directions:
1.    Preheat oven to 360 degrees and line cupcake pans with liners (about 24-30).
2.    Mix sugar, brown sugar and oil until smooth.
3.    Add sour cream and vanilla extract, stir well.
4.    Add eggs one at a time and mix only until incorporated.
5.    In a separate bowl stir together flour, cocoa, baking powder, baking soda and salt.
6.    Add dry ingredients and boiling water to sugar mixture alternating between the two.
7.    Spoon ¾ teaspoon of graham cracker crumbs into the bottom of each cupcake liner.  Shake pan to spread evenly.
8.   Fill liners ¾ full and bake for 18-22 minutes or until a toothpick comes out clean.
Cooling after baking....one cupcake HAD to be tested though.
9.   Mashmallow Cream Filling: Beat cream cheese, marshmallow cream and powdered sugar.  Add more powdered sugar to taste.  (This mixture should not be thick like a buttercream, because it will be in the center of your cupcake.)
10.When cupcakes are cooled, cut out a small area from the top of the cake and pipe marshmallow cream into each cupcake. (Keep all of your cake pieces in a bowl for a snack!)
Filled with yummy marshmallow cream   
What the inside of the cupcake will look like...notice the graham cracker bottom.
 11.   Graham Cracker Buttercream: Beat cream cheese and butter until light and creamy.  Add powdered sugar, vanilla and graham cracker crumbs.  At this point, the buttercream will look like cookie dough.  Add heavy cream a little bit at a time until buttercream consistency is reached.
12.  Pipe onto cooled, marshmallow filled cupcakes and enjoy!

 Yields 24-30 cupcakes. 
Perfectly good cupcake waiting for a hungry tummy!
All packed up and ready to go say "Thank You" to the nurses at the hospital!

Poor Murphy still doesn't understand why he can't have one...

Is your mouth watering yet?  Well then...get in the kitchen you Betty Crocker you!  Anyone can do this...when you bake them be sure to come back and tell me how much you loved them.

Peace out for now!

Sunday, October 21, 2012

Our Guest Bedroom

Come on in!  Kick off your shoes and stay a while......welcome to our guest bedroom.  After four years with the hubs we finally have a guest bedroom! Woo-hoo!  I love having a place for our family and friends to stay while they visit.  I believe a guest bedroom should be two things....COZY & COMFORTABLE.  We may not have much space in our house but you bet we will make a space for you to stay that feels as much like home as possible.  And, of course, you are welcome anytime!


A basket full of goodies stays stocked in the guest bedroom.  Never know when you might have the midnight munchies!  I have yet to find a bedside carafe I like so bottled water or sparkling water will work for now.


I looked everywhere for striped curtains for this room.  Guess what?  I couldn't find any I liked.  So I purchased two white curtain panels and painted gray stripes for custom curtains!  Yes, they should be longer but you live and learn right?
 

The unique "be my guest" sign is just a simple Hobby Lobby buy (it's in stores now for fall).  It isn't meant for chalk but hey, it worked for me so why not?  I call this "temporary personalization". Chalk is fabulous.


An antique toolbox filled with seasonal flowers adds a small touch of fall to the room.


Have I mentioned how much I LOVE having wood floors throughout the house?  The empty space to the right is the common suitcase area where guests can unpack.  Spoiler alert!  This space isn't always cleared.  Murphy has a huge bed that fits perfectly in the corner where he regularly sleeps.  He is super happy when guests come to stay with us because his bed gets moved to the floor on my side of the bed in our bedroom.  But, obviously, he loves visiting with his guests while they are here.
 

This ole "thing" has been around since I was a senior in college.  An exciting Goodwill find was transformed from a brown coffee table with a hole in the top to an ottoman coffee table with glossy black paint.  The hubs and I used this in our living room at our last place but it wasn't working in our current living room.  After two years of heavy use and going through a move it needs to be spruced up, but it will work for now in the guest bedroom.


I LOVE bringing the outdoors in and having evergreen bushes has allowed me to do so.  Evergreen stays green....well, if done right.....forever!  The evergreen shown was cut this summer and is still a beautiful green color.  Let's be honest about this corner though.....I've never dreamed of sticking a stool in a corner and putting a vase of green stuff in it BUT...I needed some height in that corner and these are things I had around the house.  That equals FREE.  Remember to decorate for now!


I call this our wedding wall.  Just brings a smile to my face every time I see it.


Another Goodwill find!  This side table was a mere $7 and only needed a coat of paint.  I actually bought this the same time I bought the coffee table and this used to be my TV stand!  Oh the various functions of furniture during college...LOVE IT!  You will always find the latest issues of Country Living magazine in the nightstand along with a beautiful hand woven quilt in case you get cold at night.


Our number one priority for our guest bedroom was to have a comfortable mattress.  There is nothing worse than not sleeping well when you are away from home.  The day after we moved here we took advantage of my dad's truck and I went to buy a mattress.  After plopping down on a couple, I picked this one because of the pillow top, comfy! 


I LOVE having all white bedding because when guests leave you can just throw it all in the washing machine with bleach.  Keep the main bedding white and change up the colors with accent pillows.  


Oh here comes story time....I MADE this headboard.  It may not look perfect but it was very inexpensive compared to the headboards I had been shopping for.  Oh you know me...if I can't afford it I just make it.  


Gorgeous duvet right?  Well it was free AND has a great story.  This came from my stepmother's mother.  After she passed there was an auction to sell everything in their house.  At the end of the auction there was still "stuff" everywhere and I found about ten old quilts in a garbage bag.  My oh my how I value old quilts that are timeless!  There are a couple of small holes in this duvet but it is SO comfortable and soft. 


To make me LOVE IT even more it's decorated with Fleur-de-lis....(sigh)


Above the bed I loved adding some character by displaying my great-grandmother's dishes.  I don't have the full set of these dishes so they work wonderful as decor.  Granny Anny would be proud!


Got to have a mirror in the guest bedroom so you can check yourself out!  And more character added to room with this hand painted wooden sign by....me.


Like the rest of the house, there is a ton of natural light in this room.  As well as a beautiful view of the changing leaves of Tennessee.


A simple yet cozy room for you to stay any time you like. Hope you enjoyed your visit and learned a couple of tricks of how to make your guest room cozy!

Peace out for now!


Tuesday, October 9, 2012

MUST LOVE DOGS....

Anyone who knows the hubs and I understand our love for dogs.  We both grew up always having a dog in the house and I cannot imagine our house without one.  Needless to say, I also enjoy decor that incorporates dogs.  Check out our space that is nestled in between our dining room and living room.  I was never sure what to put here...I know it will be a great place for a Christmas tree but what to do until then?  I decided to make it a focal point to show our love for dogs, and how precious of a space it is.


In this house, if you can't tell, you MUST LOVE DOGS.  I've decided if I ever come back in another life I want to be one of my dogs.  Keep scrolling down to see where I found all of these unique items...


The prints were a find at none other than Hobby Lobby where the hubs spotted them.  Yes, my husband likes to go to hobby lobby....but no more than four times a year.  Having a giant schnauzer, it is obvious why we NEEDED the top print right?  

As for the bottom print, my FIL (father in law) likes to call Murphy "Black Dog" so being that the prints came in a pack together we are lucky they both have meaning to us all while looking cute.  The black frames I've had for a while and they were found where everyone should always look in Hobby Lobby....that's right friends...the clearance section.  

The tan fleece blanket draped on the side of the bench was a steal for only $5 at Kohl's.  I remember how excited I was to find this on one Black Friday shopping extravaganza....it's the small things in life people.


Silhouettes are timeless aren't they?  I LOVE the look of them and how personal they are while still being simple.  I will have a tutorial link up on how to make these silhouettes in a later post. The pillows I purchased, yes I needed actual pillows, in the clearance section at Target.  The silhouettes are temporary so I can always use the reverse side of the pillows or make new silhouettes when/if I need to.  It "works for now"!


The bench was a find two years ago at a furniture consignment store.  Holy cow....almost all of my furniture is from furniture consignment stores......shamed?  Goodness no!  One proud/happy girl!  This bench used to bear a bad stenciling job by a grandma (no offense grandmothers) with no taste.  A can of black glossy paint and a couple of hours in the garage made this bench a whole new person!  Remember to always look at the "bones" of the furniture when buying it used.  Paint can transform almost anything.


A toy for your thoughts?  A tote found at TJ Maxx holds our pups toys.  Maci and Murphy LOVE pulling them all out and playing with them...if only I could teach them to put them all back in the tote when there are finished....

Do you have an awkward space that you don't know what to do with?  Find/make some unique items you LOVE and display them all together.  If you are a collector of certain items, display them all together on chic shelving or a bookcase.  Most importantly....fill any space with items you LOVE so when you look at it every day you think to yourself..."I LOVE IT!"

Before peacing out I will share you with your our two pride and joys......


         Maci (Shihtzu & Pomeranian Mix)                                 Murphy (Giant Schnauzer)


Have fun decorating your space!  Peace out for now!


Homemade Teddy Grahams

What?  You've never made your own teddy grahams?!?  Haha, well neither had I until yesterday.  The hubs has a small addiction to teddy grahams and goldfish grahams.  I usually keep them in the house to curb his sweet tooth because they are lower in fat and calories than say....freshly baked chocolate chip cookies or an apple cobbler.  But ever since we moved I have not been able to find the goldfish grahams in grocery stores here.  Also, the hubs can down a box/bag of them in two or three days.  At about $3-$3.50 a bag it becomes an expensive snack!  Now, I haven't searched high and low for them to completely rule them out....but it did give me an idea!  Why don't I just make some?  So I did....


Talk about yummy!   Why had I never done this before?  These homemade teddy grahams are much like a crisp honey cookie. When you bake them your house is filled with a fabulous aroma of cinnamon & honey. And not to mention they are shaped like precious little bears.  

Don't have a teddy bear cookie cutter?  Use any cookie cutter you have, no biggie!  I found my cookie cutter at, don't laugh, Hobby Lobby for only 53 cents.  

On to the recipe!

Teddy Grahams

Ingredients:
  • 1 ¼ cups all purpose flour
  • 1 cup whole wheat flour
  • ½ cup sugar
  • 1 teaspoon baking powder
  • ½ teaspoon baking soda
  • ½ teaspoon salt
  • 1/2 teaspoon cinnamon
  • 1/4 teaspoon nutmeg
  • 5 Tablespoons honey
  • 1 teaspoon vanilla
  • 1/2 cup butter, melted
  • ¼-1/2 cup water
Instructions:
Pre-heat the oven to 350.  Mix dry ingredients in the bowl of a standmixer on low.  In a separate bowl add the honey to the (warm) melted butter and stir until smooth.  Stir in vanilla with the honey/butter mixture.  Add the honey/butter/vanilla mixture to the dry ingredients and stir. Slowly add the water until the dough comes together nicely.  Turn dough out onto a lightly floured surface and roll dough about 1/4 inch thick.  Cut with cookie cutter of your choice.  Bake grahams for about 10 minutes or until the bottom is golden brown.

Recipe makes about 100 small teddy grahams.

Cutting out the cute bears before they go in the oven
 
The bears enjoying their tanning session
 
I cooled my bears on a cooling rack.  You'll notice there are some bears missing....the hubs couldn't resist and took a bear here and there instead of all from one place....he likes to test my OCD tendencies.


This recipe will make approximately 100 teddy grahams.  

The hubs appreciated these homemade teddy grahams and I am much happier making teddy grahams rather than buying them.  And, of course, they are so much better than what you can buy in stores!

Craving some teddy grahams now?  These were super easy to make and took me about hour in the kitchen.  Talk about fun!  If you have kids they would love to make these.  Try them out...let me know what you think.

Peace out for now!


Sunday, October 7, 2012

Our Fall Living Room

As a family who spends a whole lot of time in the living room, I've learned that function is our main priority.  You have to be able to live in your space but it also has to be a place you want to live.  Having a cozy living room is what I constantly strive for.  What's not to love about a room that allows you to relax, have fun and spend time with your family? 

I'd like to welcome you to our main space, our living room, ready for fall...


How about all of that natural light?!  I apologize for the photos because most of them are very bright, but a girl can't complain about some sunshine raining in.  That fluff ball on the ottoman?  Just ignore her.  That's Maci and she likes to be in pictures whether I want her to or not, but I don't mind.  Just gives you the true feeling of what life is like in our living room.


A pie crust table...have you ever heard of such?  The precious side table in the picture above is what is called a pie crust table because the top outer edge looks like a pie crust would.  Don't laugh if you already knew what one was because I had never heard of them until I found this one, in great condition, at a hole in the wall store in my hometown for $30.  I'm pretty sure I "stole" it from the guy because I have seen many of them since then that cost WAY more than that.  Sometimes you just have to bat those eyelashes girls....;)


We found this chair before we moved, at a discount furniture store, for only $70!  I claim it as my chair.  Like I've mentioned before...we are on a limited budget so the nice leather chair we love at Pottery Barn will have to wait until we can afford it.  In the meantime, I find is feasible to purchase furniture like this that will "work for now".  
Chevron print galore!  It's become such a popular print these days and I understand why.  This chevron print pillow cover was an Etsy find.  You can find the shop I purchased them at for only $10 a piece by clicking here.  A budget friendly tip is to start purchasing pillow cases instead of whole new pillows.  You can completely change the look of a couch, bed or sitting area by changing up the pillows.  So instead of buying new pillows and not knowing what to do with the old ones, just look for pillow covers.  I LOVE pillow covers for another reason...you can wash them and not ruin your pillow!  Having two dogs and a husband who has to have five pillows to cozy up with, I need to wash mine frequently.  It is SO much easier to wash a pillow cover than washing an actual pillow or having to pay to have them dry cleaned. 


This lovely wooden rocker was pulled out of the hubs' grandparent's attic for us.  We are so thankful to be able to use it in our home.  Its was the hubs' great-grandfather's rocker.  Oh the stories it could tell...


Just a little print out from Pinterest to add some personality to the room.  Joshua 24:15. Click here to print out one of your own!


An informal family pic brightens up the far wall of the room.  The frame was found a couple of years ago in the clearance section of Hobby Lobby.  You should ALWAYS check out the clearance section when you shop there.  This frame came home with me for a mere $12.  The canvas I had printed at Sam's Club when they were having a sale on them.  NEVER buy canvases like this until they go on sale.  Be patient if you decided you want one because I saved over $35 by waiting until they went on sale at Sam's Club.  Many national retailers are selling these now but make sure you research and confirm the price and quality will work for you.  
Beautiful photography skills right?  A good friend of mine from home took family pictures on the hubs' grandparent's farm before we moved this summer.  Check out her work here. It's great to have cool friends who will share their talents with you.


Halloween is almost here!  Crazy right?  I remember as a child running around with my little brother singing:
Trick or Treat
Smell my feet
Give me something good to eat!
I am sure know we drove our mom crazy but we had such fun during Halloween.  Don't worry, my mom had fun too.  She would always dress up in a costume with us and still does every year!
This halloween sign was found at none other than....TJ Maxx for a mere $12.  I label myself as a "Maxxinista" due to my obsession with the amazing store.  And wouldn't you know the lantern came from TJ Maxx as well.  My basket is a Thirty-One brand magazine basket filled with silk flowers from Hobby Lobby that I found, of course, on sale.  Hint, Hint - Hobby Lobby is another store you should NEVER buy something at full price at.  Their sale items change weekly and you can ALWAYS use a 40% off coupon on any regular priced item.  Sign up for their weekly emails if you would like to know what is on sale each week.  Oh Hobby Lobby, if I only had all of the money I've every spent there.....(sigh)


There's the Maci-Boo!  Maci's uncle Stef gave her the nickname of Maci-Boo and it just stuck.  Funny how nicknames work like that isn't it?   
I know you can't miss that huge leather couch in the picture right?  We are so thankful to have parents with good taste in furniture because that couch was GIVEN to us from the hubs' parentals.  Yes, we even have the club chair and ottoman to match but that stays in the hubs' office for now.


I adore my Kentucky pillow with a heart embroidered on the city of Leitchfield, my hometown.  An Etsy find at only $30 for the pillow cover.  A little pricey for me but custom items add such character in your home.  You can find the Etsy shop here. I had an old pillow that didn't really go with any of my decor anymore so I used it to fill the pillow cover.  I remember hearing a saying about shopping for things that you love, when decorating, and you will always find a place for it in your home.  Well, when if come to this pillow, I LOVE IT!


Oh how I love having a mantle to decorate. 


These built-in bookshelves are amazing.  Although I don't use them for books I do use them to display items that make me happy.   Reading blogs like this one really helped me tie all of mine together without "over-filling" them.  Simple rule: find things that truly make you smile or feel at home to put in your bookcases.  You can never go wrong by doing that one thing.


Kentucky, The Bluegrass State. This cute little plate I actually found in an antique shop while on a vaca Out West, in a cool town of Cody, Wyoming.  How much you ask?  $14.95  Nice work, I know.  Having items like this and our Kentucky pillow really reflects who we are and reminds us of home.


You can never go wrong with family pictures in your bookcases.  Buy frames that work for the space and you can always change out the pictures when you like.  Again, order prints when a store like Walgreen's (my main photo squeeze) is having a sale on prints.  These photos are more great work from a friend found here.

Another pumpkin?  Yep!  Remember I said I collect more and more each year...a small obsession of mine.  This ceramic one was actually one of my first pumpkins that my MOH bought for me as a wedding shower gift.  I have to share the gift idea from her....I received a huge storage tote filled with "starter decorations" for each holiday of the year.  She had searched the sale racks for a year and bought one decoration (or two) for each holiday in order for me to start with as a newly married woman.  A gift idea I LOVE!


I'll give you one guess where this sign came from.....that's right, Hobby Lobby.  Go easy when it comes to decor like this...I believe they are great accents here and there but I try not to have more than two in each room.  Simply put, it's just something that people easily over-do.  
Accenting the sign is a lamp shade "thingey".  I have no idea it's name but you are supposed to hang them on your lamps to add a pop of color.  I changed the color of our living room lamps, after the move, and the darn thing didn't match the lamp anymore.  But don't worry!  I can always find a place for something I love!


Hoot! Hoot!  I couldn't pass up this adorable owl at TJ Maxx.  The hubs thinks it's weird but I think the owl is precious and reflects the fall season.  All of my grandmothers are awesome and one of them gave me this gourd a couple of years ago.  It was already painted and I just grabbed a paint pen and personalized it for our space.  Thanks G-ma! 


"I don't like those creepy wooden figures without faces."  My step-father thinks Willow Tree figurines are pretty weird.  Now I'm no collector of them but these two have special meaning to me.  The one on the right was actually our cookie tower (wedding cake) topper at our wedding.  I wanted something I could keep from our Southern Wedding.  The figurine on the left was gifted to me from a best friend.  If something has meaning to you...keep it and display it!


One of the hubs' graduation gifts from his parents was this awesome flag that was flown over the US Capitol Building the day of his medical school graduation.  I mean, how cool of a gift is that?  I know right, we have amazing parents.


Another budget friendly trick for decorating is to buy clear vases or apothecary jars and display seasonal items in them.  You can move them around your home where they work best and change out what's inside of them to fit each holiday or season.  Another useful hint, they work fabulous for parties or showers you may host when you have a large quantity of them.  I hosted a shower this spring and used all of my clear glass items.  The bride liked the look of them so much she borrowed them for their wedding reception for cost-friendly decoration. 


A burlap bunting can warm up any space.  I whipped up this bunting in about an hour and the process was super dee duper easy.  I will have a tutorial on it in a later post.  I am limited on decoration for the mantle because our TV hangs above it but a girl does what she can!  FYI I never light these candles because the hubs would panic due to the flame being so close to the TV....just like I mentioned in the Fall Dining Room blog post, when photographing you have to jazz it up people! 


And for my second printable!  Click here for a selection of free fall printables.  I plan on keeping this frame here all year long and changing our the print to coordinate with each holiday/season. And, of course, more pumpkins.  I'm telling you, obsessed with them.  
For the lamp, it was purchased during my college days at a thrift store and it's been spray painted more times than I can count.  If you aren't afraid of doing so, simply spray paint lamp bases to completely change the look of a room.  When you get tired of the color or change your decor, just spray paint it again! 


The only bummer about the rental house is we aren't allowed to use the wood burning fireplace.  Yes, a let down but we are so thankful for everything else we have in a rental house.  A fireplace that can't be used shouldn't be ignored though!  I found this large basket at the infamous home decor consignment store for only $20.  I am not digging the color of the basket so I simply sanded down the visible edges to add a little character.  It works great holding all of the blankets for the room.  I'm usually not comfy until I'm wrapped up in a blanket so we always have blankets in our living room to cozy up in.  The blanket peeping out of the top of the basket belonged to a grandmother who has passed on.  Isn't is wonderful to have pieces like this in your home to remind you of your family?  I LOVE IT! 


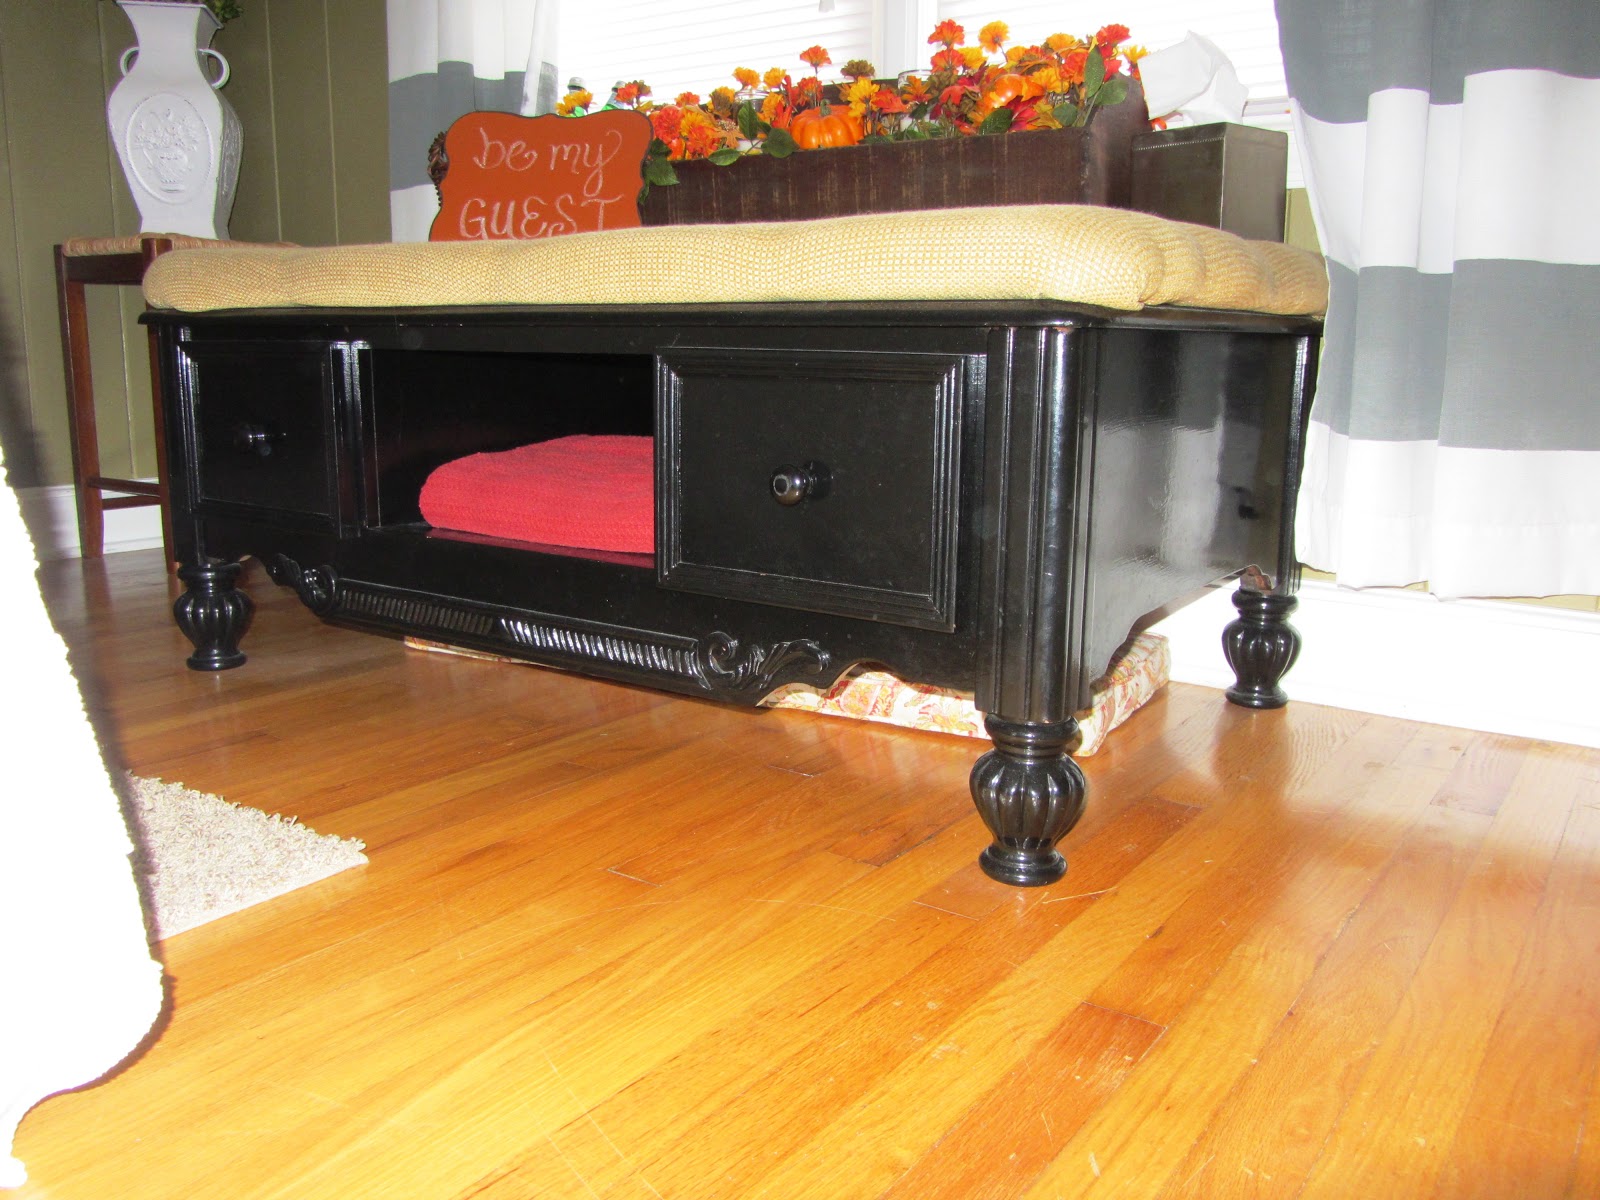
These ottomans sit right up against the window in the living room.  The hubs spotted these for $10 a piece before we moved here.  They had a few stains but were in great shape.  The hubs' grandmother (who can sew anything) made these covers for us that fit the ottomans perfectly.  They work wonderful in front of the window, as a footstool or even extra seating when lots of people visit.  


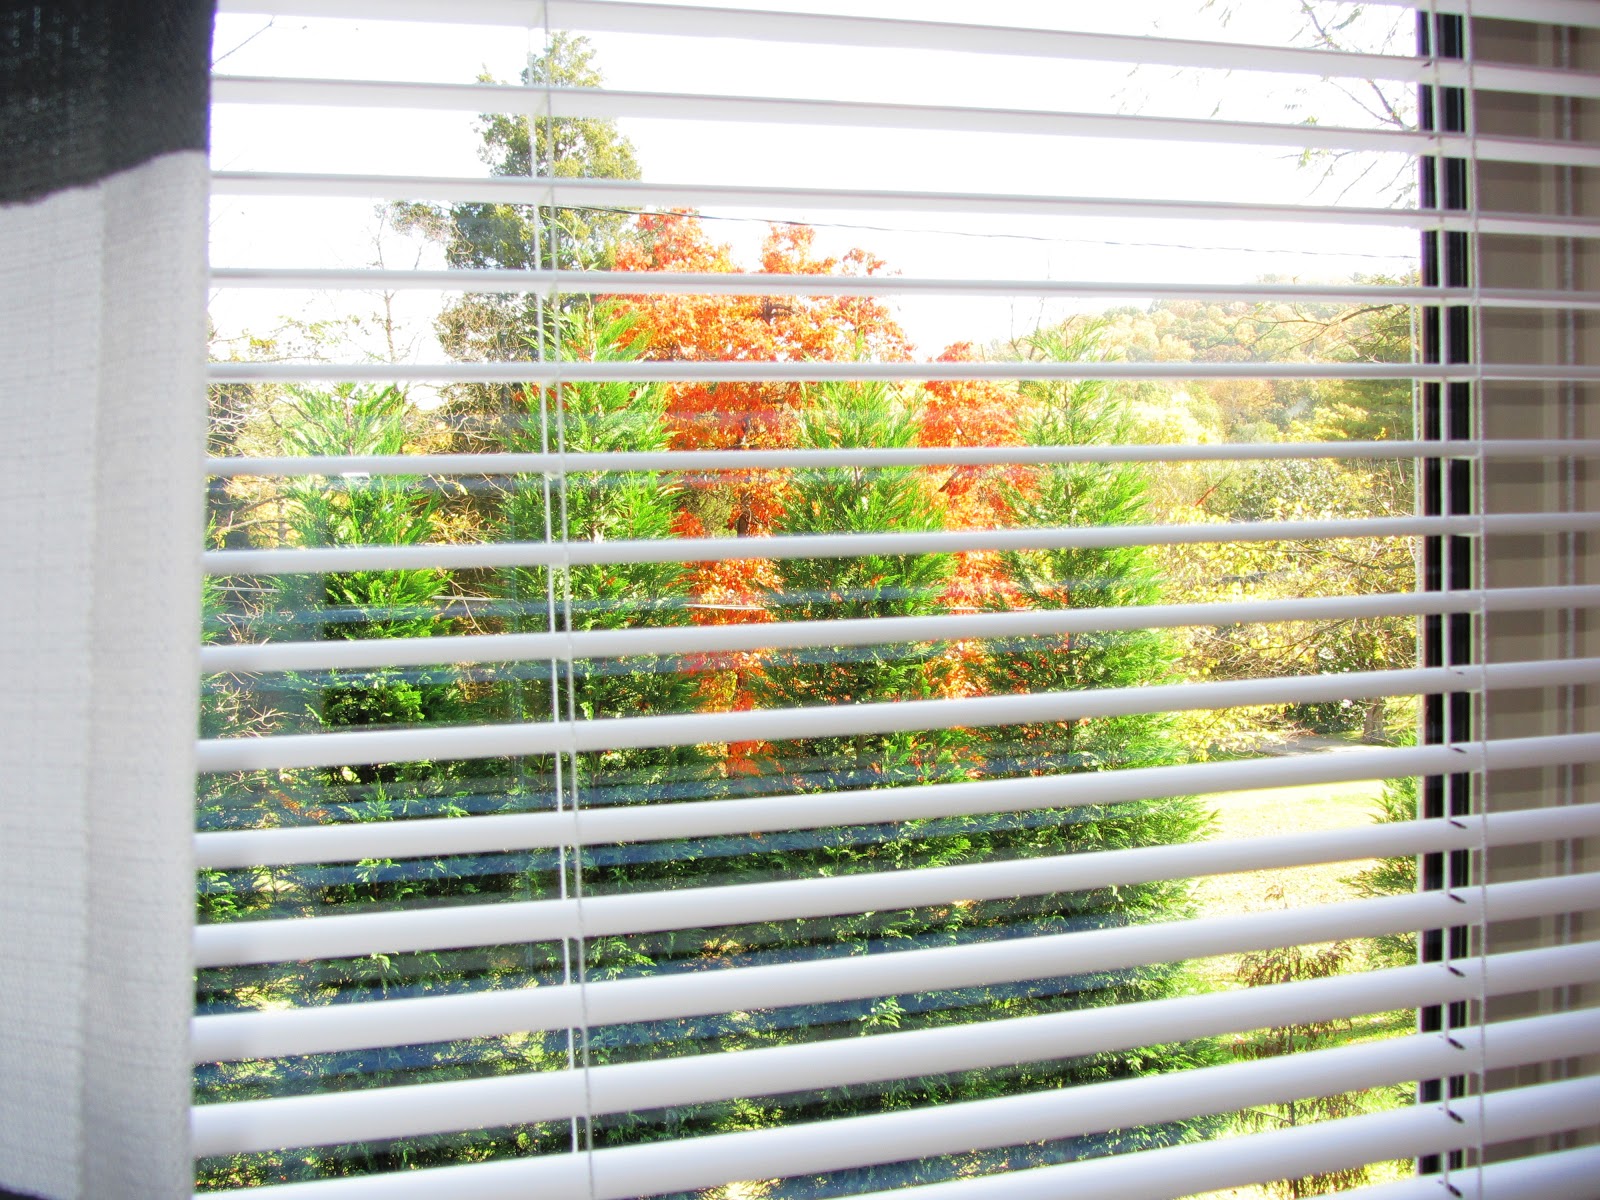
I felt the need to show you the view from our living room.  I originally had the couch up against this window but I couldn't resist this view and all of the natural light it lets in.  Being that the ottomans are right up against this window it is designated as Murphy's spot.  Just like I promised...the window blind is pulled 1/4 of the way up as Murphy requested.  He likes to sit here and watch squirrels run around in the yard.  He also loves rubbing his nose around on this window to make, what I call, nose art for his mommy.  Needless to say, he gets a "clean canvas" a couple of times a week to restart a new project.


Shew!  That was one long post!  Thanks for sticking around to view ALL of our living room.  A cozy, homey, comfy space for us to LIVE in.  Are you comfortable in your living room?  Does your living room reflect who you are?  As you can see, most of our decor/furniture was found in furniture consignment stores or handed down from family.  Case and point that a room can look cozy (I think) without spending a fortune or having the "nicest" things. 

Hope you are inspired to make your living room a reflection of who you are and comfy enough to LIVE in.

Peace out for now!