Tuesday, December 18, 2012

Fresh Christmas Decorations

There's nothing better than the smell of a fresh Christmas tree in your house for the holiday season.  But why stop there?  Spruce, evergreen, boxwood, magnolia leaves, pine cones, the list goes on and on......and the best part?  All of these things can be found for free!  

So why not use nature to decorate?  It adds a warmth and scent to your home that cannot be accomplished with anything else. 

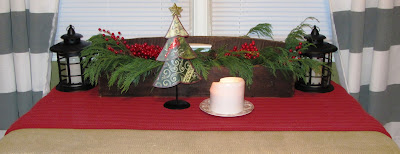
I was able to use cypress tree branches, boxwood stems, logs (yes, logs) and clippings from our Christmas tree.  Below are a few ways I used them to decorate our place this year. 


Beautiful boxwood garland right?  Well, Murphy (our giant schnauzer) actually picked that out.  Yep.  We were shopping at an outdoor craft fair and Murphy...well...marked it.  Yes, he peed on it.  After the look of horror faded from my face I gladly paid two lovely ladies for the garland.  Don't worry, I hosed it off VERY well and let it dry for two days in the sun before I brought it into the house.  Atleast he has good taste right?


Bringing the outside inside was very fun to do this year.  Free, beautiful, simple and easy....

What fresh things have you used to decorate with this Christmas?  

Friday, December 14, 2012

Hot Chocolate Bar

What could be more inviting/fun than a hot chocolate bar?  This is a first for us this year and we love it so far this Christmas season.  I found a recipe for a hot chocolate mix, which is SO easy and delicious, and after I tasted my first sip of hot chocolate I knew a hot chocolate bar would be in the works...


Find the hot chocolate mix recipe  here.  Be sure to use dutch process cocoa and whole dry milk (I found it in the Spanish aisle). FYI - I did not dare put in the cayenne pepper...no way.

As for your hot chocolate bar try to think of items you, your children, and your guests would actually use.  I kept it simple for our family because...we are simple people! 


Our must haves were the following:
                       -marshmallows
                       -milk chocolate chips
                       -cinnamon
                       -spoons
                       -mugs
                       -hot cocoa mix

Simple right?  We just grab a mug, put in two teaspoons of hot cocoa mix, use hot water from our Keurig, and add in our marshmallows and chocolate chips.  

Yummy and pretty.  Does it get any better?  


What would you have as mix-ins for your hot chocolate bar?  

Enjoy this wonderful holiday season!


Thursday, December 13, 2012

Wrapping Paper Theme

Wrapping Christmas presents can be much more simple when a theme is chosen.  What?  A theme?  

Yes.  A theme.  

This year I decided to pick a color scheme that would stand out and be different from the theme of our tree.  And, of course, buy all of my supplies on a budget!  

Mission Accomplished.


Here are the details:

                       Wrapping Paper from Hobby Lobby - $4.00
                       Two Rolls of Ribbon from Hobby Lobby - $8.00
                       Gift Boxes from The Dollar Tree - $9.00
                                                                                                   Total Cost - $21.00

I've wrapped anywhere from 25-30 gifts so far with the same roll of wrapping paper....WOW!  The paper from Hobby Lobby is super thick and goes a long way.
    

I also decided to do away with the traditional stick on gift tags.  Each gift has the initial of the recipient.  Since the black and white wrapping paper is very distinct from other traditional wrapping papers I figured I didn't need to write who the gift is from.  So each gift is unique in it's own way.


How's that for wrapping presents on a budget?  What will you choose as your wrapping paper theme this year?


Wednesday, December 5, 2012

Label Your Stockings

And the stockings were hung by the chimney with care....


I am so thankful and lucky to have been gifted beautiful handmade stockings by the hubs' grandmother.  She even incorporated parts of my wedding dress into the top of my stocking...how cool is that?!?  I felt the need to somehow "label" the stockings to show which stocking belonged to who.  Another trip to Hobby Lobby......

It's simple.  Here is how it goes:

Step One: Prance into Hobby Lobby, or your local arts and craft store, and purchase an appropriate sized wooden letter for each stocking.


Step Two: Spray paint wooden letters the color of your choice.  Choose a color that will complement the stocking but not over power it.


Step Three: Write a name on the bottom right hand corner of each letter with a sharpie.  


Step Four: Hot glue ribbon to the back of the letter, making a loop.  Be sure to make all loops the same size so letters will hang evenly.


Step Five: Hang letter with appropriate stocking, step back, and admire your handy work!


There you have it!  Such a personal touch for so little money and time.  


This project cost me about $4 total.  I always have spray paint and spare ribbon on hand so I simply purchased the wooden letters.

And yes, I have my stockings hung with two stocking holders and a curtain rod.  Love it!

I hope you enjoy decorating and celebrating Christmas this year.

Peace out for now!

Tuesday, December 4, 2012

DIY No Sew Burlap Tree Skirt


Tree skirts can be really expensive when you go to buy them.  I discovered this when I went looking for one last week.  I also discovered most stores have very generic tree skirts that are very "Christmasey"...you feel me?  

So you know the drill...if I can't afford it....I MAKE IT!  Luckily, my aunt had just given me tons of burlap while at her house for Thanksgiving so I decided burlap would be the material to use.  

One problem......I don't sew (yet).  Another problem.....burlap is sold in lengths that aren't wide enough to make a full tree skirt to fit our tree.  Well....I better figure out how to make it work!

Let me explain....

I laid out the burlap and flattened it out the best I could....creases are no good for cutting.  After measuring the base of our tree I drew a circle, with chalk, where the tree would be.  Now, because the burlap I had was not wide enough I simply hot glued some extra burlap pieces to the original burlap piece to make the width I needed (you can't even tell).  Our tree sits up against a wall allowing me to make the skirt longer in the front and shorter in the back.  

Step One:

Cut burlap according to the measurements of the base of your tree.  Our tree base was 14'' so I cut a 14'' circle in the middle, cut a slit for the opening, and rounded the edges of the burlap to make a circle.


Step Two:

Hot glue, yes hot glue, your choice of ribbon around the edge of your tree skirt.  I used straight pins to keep my skirt on the ironing board while gluing.  My tip is to choose a material that has ruffles.  The ruffles are not only cute but they work better around a circular object.


 Step Three:

Place your tree skirt around your tree, take a step back, and admire your gorgeous (inexpensive) work.  Now, don't tell...but I actually ran out of edging for my tree skirt...but no one will ever know (except you) after all of the presents are under the tree.  I can always hot glue some more edging later....


I mean come on....how simple is that?  Looks good, is inexpensive, very easy...can you ask for more?  

This tree skirt cost me a mere $4....for the ribbon edging.  If I had to buy the burlap I probably would have spent about $14...either way...you can't beat that.


Oh Christmas...how I love thee.

I know your tree skirt will turn out great!  Peace out for now!